
![]()
![]()
![]()
![]()
![]()
![]()
FOR MANUFACTURERS & RECONERS
The first
step in re-coning is to get every thing organized. Make sure you have all
your speaker components and the adhesive you plan on using. Depending on
which adhesive method you plan on using for the job, it is especially important
to have all of the components ready when using the instant adhesives or the
epoxies. The solvent and water based adhesives are a little more forgiving
when it comes to speed of the assembly. No matter which you prefer to use
Global Adhesives has the product to do the job.
We have put together the following tutorial to help assist
you with your options and how to apply this to your job. As always, if you
are in need of any assistance, please do not hesitate to contact us at our toll
free number(1-800-331-7724). We are here to assist you in making your
re-cone a little easier and faster.
|
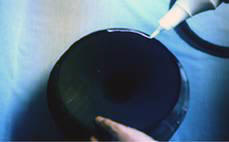
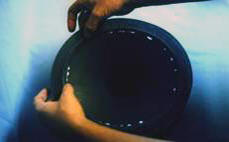
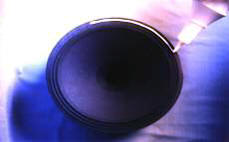
STEP #1 Bonding The Cone To The Surround: |
Because it takes a while to dry, apply the white flexible water based #WD-32 adhesive to the lip of the paper fiber cone. Then press the cloth surround into the adhesive. The excess white glue can be cleaned of with a damp cloth. You can also use #GA-422 or #GA-410 on these fiber cones and cloth surrounds. Apply the #GA-422 instant adhesive to the cone lip, press the surround into the adhesive and then spray the Lightning Tack Accelerator on the surround and it will soak through the cloth and instantly set the #GA-422. If you are working with foam surrounds and poly-cones we would recommend you use the black solvent based #BC-32 with the same process as above. Once you have gotten the surround positioned on the cone you can use a hair dryer to speed up the process. You will need to prep the surface of both the surround and the cone for the #GA-422 and the #GA-410, where the bond will be with the surface conditioner Poly Primer.
 |
 |
 |
|
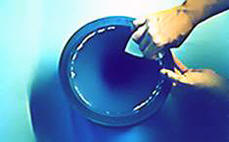
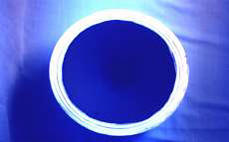
STEP #2 Applying Dampener To The Surround: |
Apply the white #WD-32 to the surround in 2-3 beads around the surround. Then brush it out to coat the entire surround. The adhesive will dry to a non-tacky clear flexible surround treatment. The #WD-32 is fairly thick and can be thinned with water. Add a tablespoon at a time and shake it up and check to see if it is the right thickness you prefer. We have also heard some of our customers thinning the WD out and spraying it on to the surround before gluing it to the cone. You can also thin the WD with water and spray it onto the paper cones to give them a wet look.
 |
 |
 |